
Pinup
Assignment 10.1:
Exploded Axonometric Animation
Create a short (around 30 seconds) exploded axonometric video of your ENV3 project. Use simple fade-ins (keyframe transparency/opacity) to introduce each element that has been exploded. For example, fade-in the 2nd floor after the 1st, then fade-in the 3rd, then the roof.
This is a very useful technique for showing complex spatial relationships in your project. Good subjects to focus on and isolate in the exploded form:
-
- Double height spaces
- Interlocking volumes/masses
- Areas obscured in an unexploded axon by floors above and spaces in front.
Add detail to the public areas. Show furniture, light fixtures, casework — but avoid having textures and imagemaps. Include people.
Create a hypothetical layout of the guest rooms on each floor. The guest rooms do not need detail. We will use the 9.1 Dioramas for that.
Identify and expose significant parts of the project that benefit from the exploded view. This will help you plan how to organize your Rhino model to export each exploded piece. Useful techniques in Rhino: NamedView, clipping planes, Hide/Show, Snapshots (save the view, layer state, hidden items).
Begin by quickly sketching out a storyboard of the animation. What does the final image look like? What are the exploded pieces? In what sequence do you reveal those pieces?
Assignment 10.2:
Animated Concept Diagram
Create a short motion-graphics animation for your two concept diagrams – 3.1 and 3.2.
If you don’t have the Mt. Mograph Motion plug-in, use Easy Ease. Right-click on a keyframe, select Keyframe Assistant, then Easy Ease.
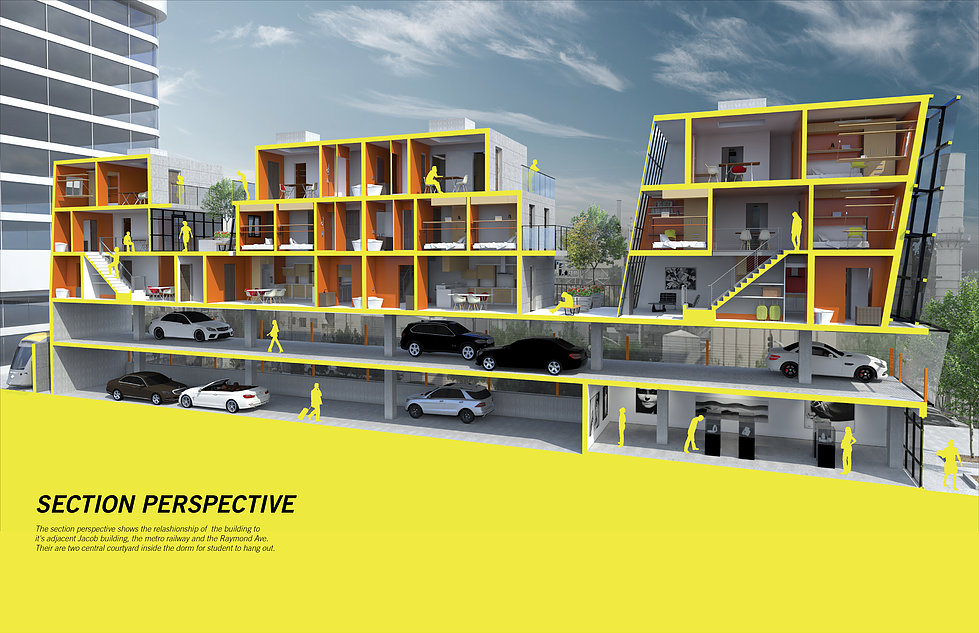
01 Section Perspective
YouTube tutorial part 1 – Rhino model prep
YouTube tutorial part 2 – Illustrator perspective grid
Steps:
- Find a good section cut using ClippingPlane
- Set the viewport property to Two-Point Perspective
- Adjust the lens length
- Save as a Named View
- Hide/delete everything not visible in the view
- Use Section to make the section cut poche outline along your ClippingPlane
- Clean up the poche outline using Rectangle, Trim, Fillet, Extend, Line …
- Use PlanarSrf to create surfaces from the poche outline
- Split the model to render
- Add fixtures, furnishings, equipment, people – MeshOutline detailed blocks
- Convert guest rooms to Blocks and make copies
- Apply different color to the poche cut (Photoshop/Illustrator post-render or Rhino pre-render)
Assignment 12.1:
Section Perspective
Create a section perspective for your project.
Try to find a single section cut that simultaneously cuts through all of these:
- the whole building
- the pool area / courtyard
- a guest room
- a required public area
If you can’t cut through all of them simultaneously, try to at least have the them close to the foreground.
Try to capture complex sectional spatial conditions.
Final Presentation Deliverables for ENV3/DL3:
- 2.1 : Vicinity Diagram
- 2.2 : 3D Site Diagram
- 9.1 : Dioramas
- 10.1 : Exploded Axon Animation
- 6.1 : Program & Circulation Diagram IF YOU DON’T HAVE program & circulation content in 10.1 Exploded Axon Animation
- 10.2 : Animated Concept Diagrams
- 12.1 : Section Perspective
For your ENV3 final presentation, you will integrate diagrams from Design Lab 3 into your presentation. Include the items listed above.
As we did at mid-term, use them to help tell your design story. Use them to explain specific design decisions you made that respond to:
- Site and vicinity conditions, location/locale
- Immediate context and phenomena, forces and influences occurring on the site
- Programmatic adjacencies, spatial narrative, transitions and thresholds